|
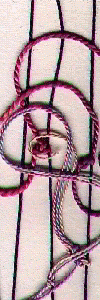
WeavingNow youíre just about read to begin. But first a word about supplies. Youíll need a pair of scissors that cuts yarn easily. Youíll also need a needle or two. Right now my favorite needle is a long, plastic one that I got in a kit awhile ago. I also use a long metal needle with a smaller eye. If you canít find any long needles (you can always get them by mail order), get a couple of different-sized tapestry needles. (Theyíre usually found with the plastic needlepoint canvas.) Be sure the needles are large enough so you can thread the yarn without shredding it. I like to have a couple of sizes because I use a variety of yarns. Speaking of yarn...since this is your first weaving, you can use what you have around your home or, again, buy some cheap acrylics. The point is to experiment and see if you like weaving. If you do, you can invest in a wider range of yarns. I find it easiest to work in stripes, and for starting out, I think you will, too. So get 3 or 4 different colors that you think will work out well together. Finally, a few words about ends. If you decide to become a serious weaver (I put myself in the slightly frivolous class), youíll need to find a way to work in the ends of your weft yarns. I find it easiest to leave the ends on the front, because shoving them between the weaving and the cardboard is a major pain. Iíve also recently started making the ends part of my weaving design, so I use nice, long ends that create a lively, fringe effect. O.K. Now youíre ready to begin. Cut of a piece of yarn about three times the width of your loom and thread it into the needle. Weavers usually work from the bottom up, because that makes it easier to pack down the yarn. So youíre going to start from the lower left corner. Count five warp threads into the loom and weave from right to left about an inch from the bottom. Start by going under, then over, then under then over, then under.  Congratulations! Youíve just woven in your starting end. The object in plain weave, which is what youíre doing, is to alternate over and under on each row. Since you ended your row by going under, youíre going to start your next row by going over. But because you just wove in your starting end, you are going to start your next row below that row. So start going over and under and over and under until you reach the right end of your loom. Smoosh the yarn down to the bottom with your fingers and weave back to the left. Youíll notice that the last five under-and-overs will match the start end. Donít worry about it--itís at the bottom and no one will notice. Now all you have to do is keep weaving until youíre finished, smooshing down each row as you weave it. When you reach the end of a piece of yarn, stop with an under and leave the end on the top. Start the next piece in the same place you stopped, with the under, and keep on weaving. Iíve found that itís too hard to weave in the last rows near the top--itís tight and I donít get good tension. So when Iím about half-way up the weaving, I turn my loom around and start with the top as the bottom. That way the tight rows come in the middle of the weaving, and theyíre much easier to work. You do have to do a little thinking ahead, but since youíre weaving stripes, youíll be able to figure things out. Thatís it! Youíre weaving! Yee-hah! Next Page Return to Table of Contents
|